
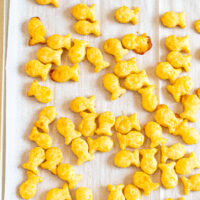
These adorable little snacks have been a staple in households for decades, but have you ever considered making them from scratch? Homemade Goldfish Crackers only require 5 ingredients! So much healthier and tastier than storebought!
Make more homemade crackers! My Homemade Cheez It’s are deliciously crunchy and cheesy!
The Best Homemade Goldfish Crackers Recipe
Homemade Goldfish crackers are one of my family’s favorite snacks! With their cheesy flavor and crispy texture, these crackers are sure to become a favorite in your household, too. It might sound intimidating, but it is actually pretty simple to make goldfish crackers at home!
After mixing the dough in the food processor, all you have to do is chill the dough, roll it out, cut out the crackers, and bake.
By using real cheddar cheese and cold butter, you can ensure a richer, more authentic flavor. The process of rolling out the dough and cutting it into those iconic fish shapes (or any other fun shapes you prefer!) adds a touch of fun that’s perfect for involving kids in the kitchen.
If you love to make homemade snacks like this one, try my homemade cheez it’s recipe, too!
Ingredients Needed
- Cheddar Cheese: Opt for a sharp, orange cheddar cheese for the best flavor and quintessential color!
- Butter: Use cold butter here! That will create the flaky, crispy texture that makes these crackers irresistible. I actually like to cube my butter and pop it into the freezer while I am prepping the rest of my ingredients.
- Flour: All-purpose flour works great here. To make gluten-free goldfish crackers, use a gluten free replacement flour blend.
- Salt: Of course, salt is needed to add extra flavor here!
- Cold Milk: Cold milk is the liquid in this recipe! It is better than water as it adds a richer flavor.
How to Make Homemade Goldfish Crackers
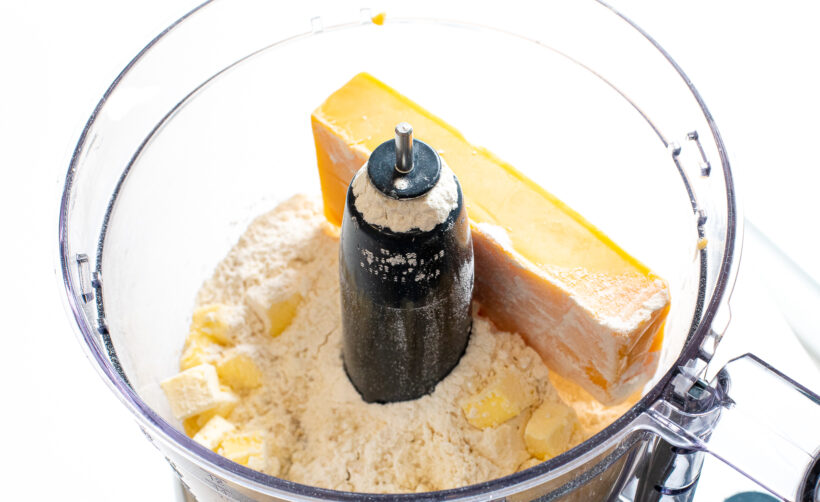
- Place Ingredients in Food Processor: Add cheese, butter, flour and salt to a food processor with the blade attachment.
- Pulse: Pulse for 20-30 seconds then add in the milk and continue to pulse until the mixture is combined and crumbly.

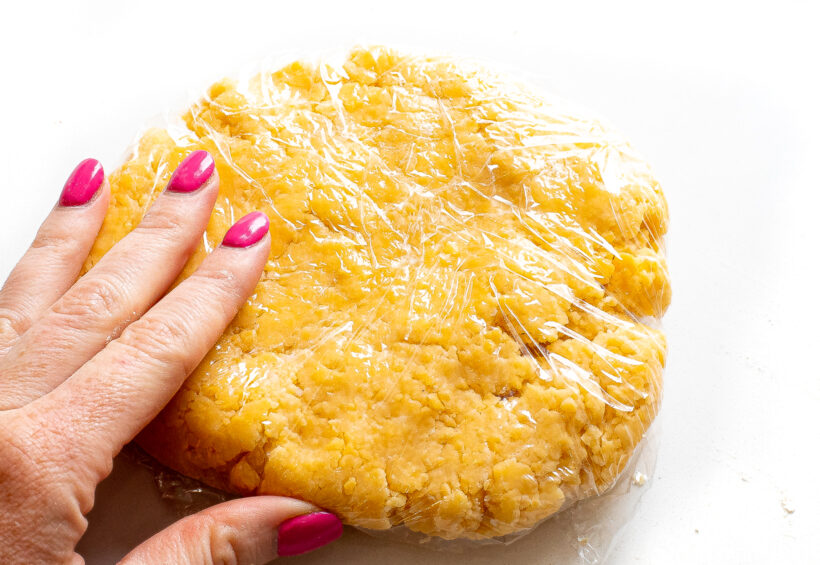
- Chill: Transfer the cheese mixture to a floured surface and knead for 1 minute. Form the dough into a ball then flatten it into a disc shape. Wrap in plastic wrap then refrigerate for 30 minutes.
- Preheat: Meanwhile preheat the oven to 350 degrees. Line a baking sheet with parchment paper.
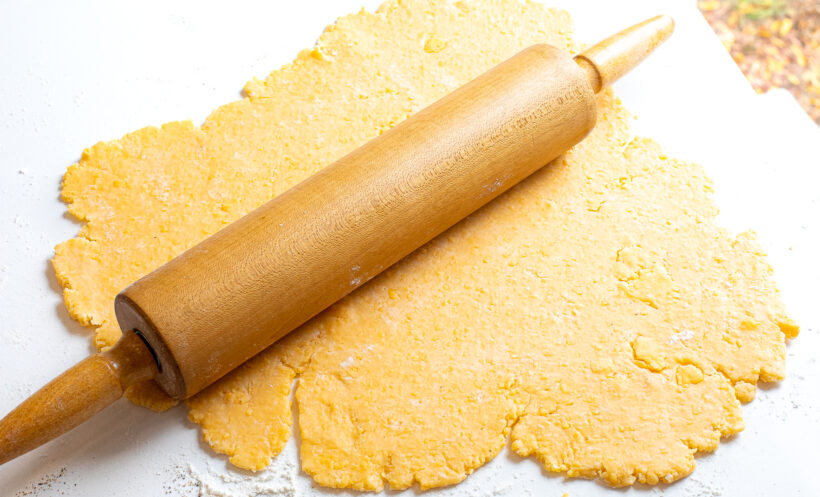
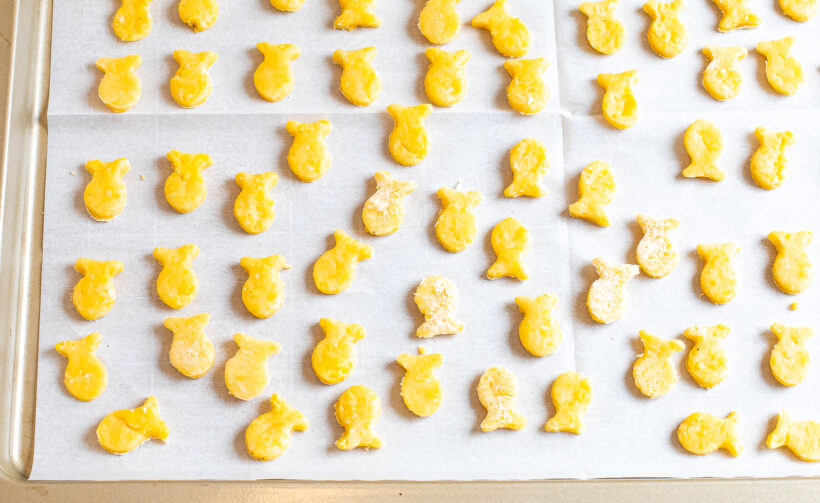
- Roll Out Dough: Remove the dough from the fridge and roll it out to a 1/4 to 1/2 inch thickness. The shape doesn’t have to be perfect!
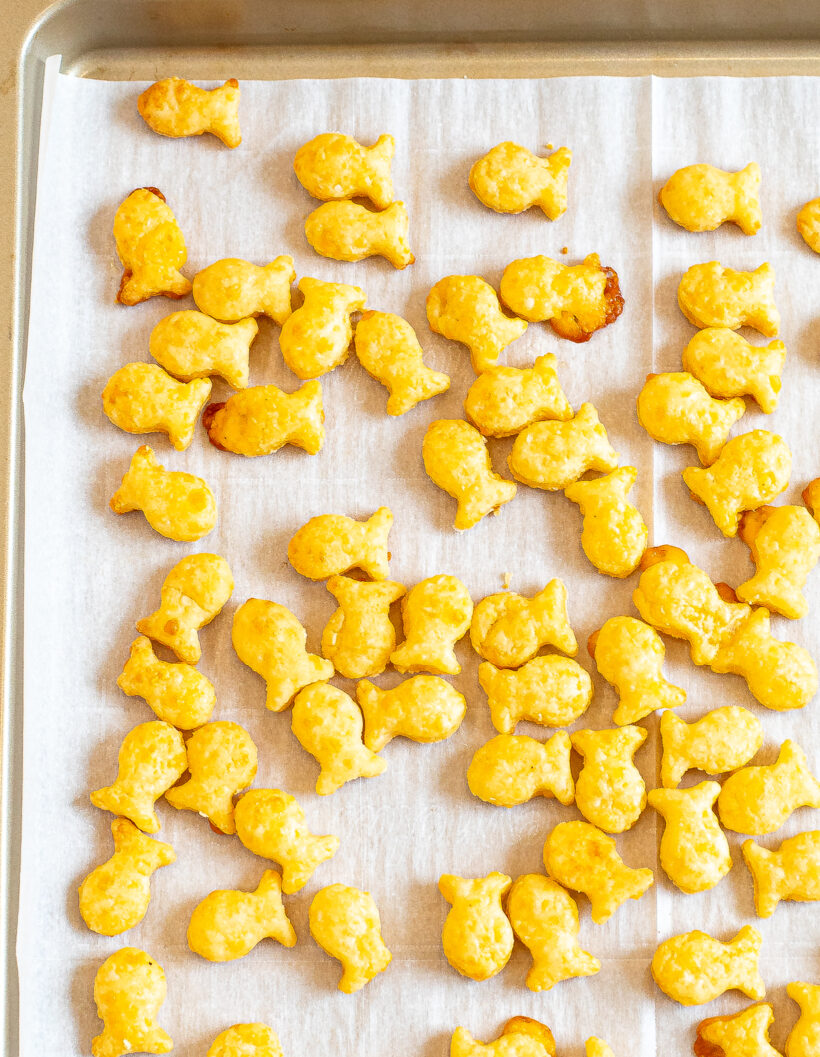
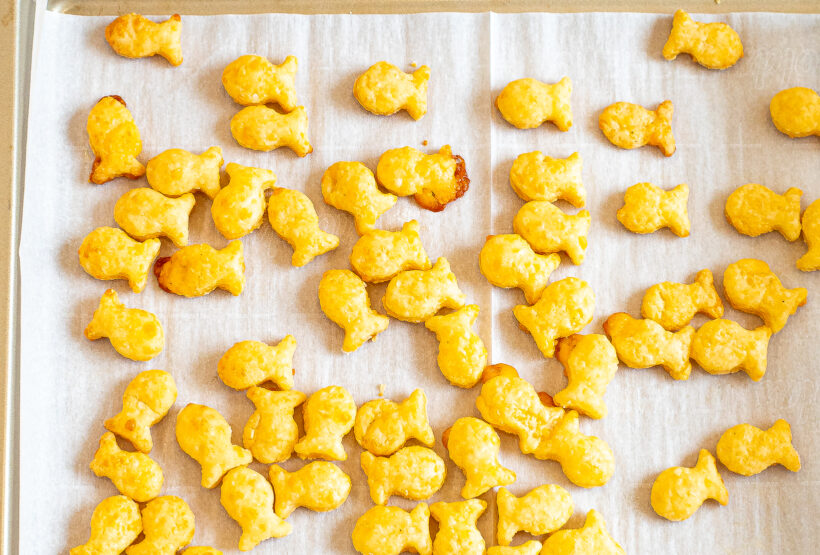
- Cut into Fish Shape: Using a cutter (here’s what I used) cut the dough into crackers. Transfer to the prepared baking sheet (making sure they don’t touch).
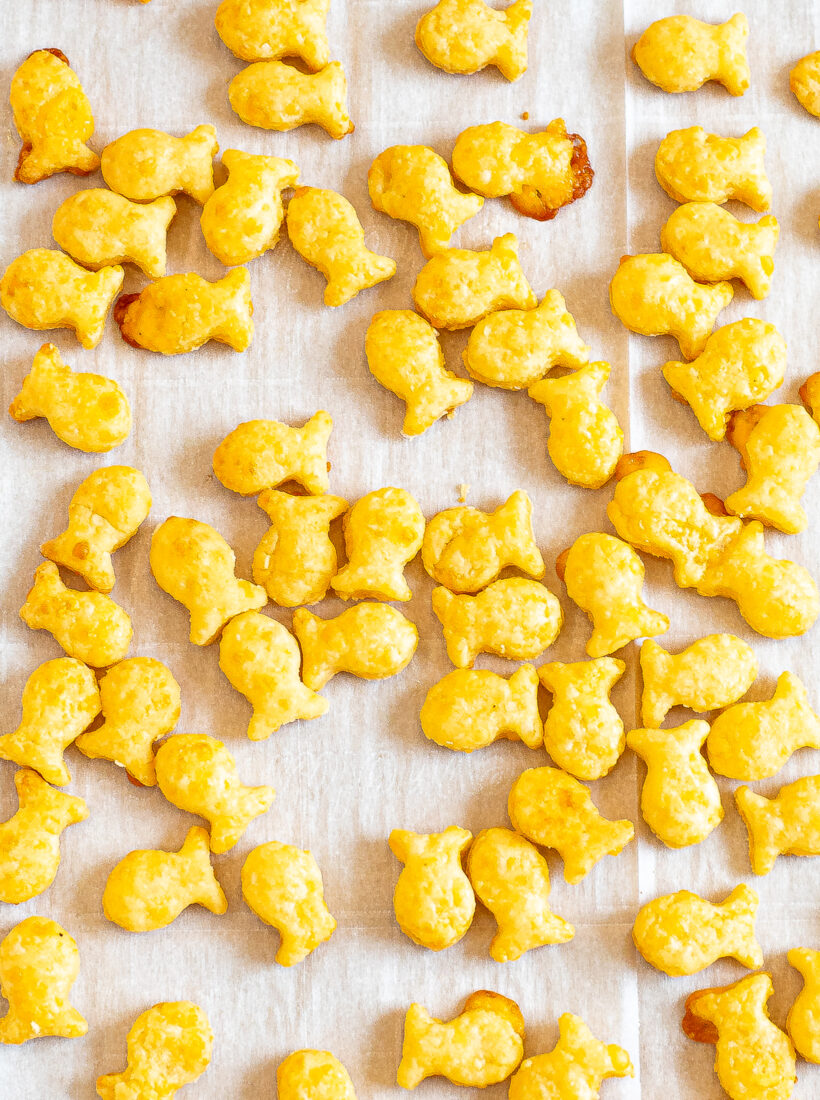
- Bake & Enjoy: Bake for 10-12 minutes or until they start to get slightly golden brown.
Tips for Success
- Chill the dough! Refrigerating the dough before rolling it out helps it hold its shape and makes cutting out the crackers easier. It also ensures an extra flaky texture!
- Adjust baking time as needed. Depending on the thickness of your crackers, you might need to adjust the time just slightly. Be sure to keep an eye on your crackers in the oven; they should be slightly golden around the edges to ensure a crispy texture.
- Sprinkle with salt if desired! For extra salt, you can sprinkle a little bit on top of each cracker before baking. This will ensure that the salt sticks to the cracker!
- To store, place your homemade Goldfish crackers in an airtight container to maintain their crunchiness and enjoy within one week.
Frequently Asked Questions
Can I use different types of cheese?
Definitely! You can experiment with different cheeses for unique flavors. Gouda, parmesan, or even a blend can work well. Just keep in mind that the colors will be different!
Can I freeze the dough?
Yes, you can freeze the dough! Just wrap tightly in plastic wrap for up to a month. Thaw in the refrigerator before rolling out and baking.

Save this Recipe
Enter your email to get it straight in your inbox! Plus, receive new recipes weekly!
Homemade Goldfish Crackers
Ingredients
- 8 ounces cheddar cheese
- 1/4 cup cold butter, cut into cubes
- 1 cup all purpose flour
- 3/4 tsp salt
- 2 tbsp cold milk
Instructions
- Add cheese, butter, flour and salt to a food processor with the blade attachment.

- Pulse for 20-30 seconds then add in the milk and continue to pulse until the mixture is combined and crumbly.

- Transfer the cheese mixture to a floured surface and knead for 1 minute. Form the dough into a ball then flatten it into a disc shape. Wrap in plastic wrap then refrigerate for 30 minutes.

- Meanwhile preheat the oven to 350 degrees. Line a baking sheet with parchment paper.Remove the dough from the fridge and roll it out to a 1/4 to 1/2 inch thickness. The shape doesn't have to be perfect!

- Using a cutter (here's what I used) cut the dough into crackers. Transfer to the prepared baking sheet (making sure they don't touch).

- Bake for 10-12 minutes or until they start to get slightly golden brown.

Nutrition Information
Did You Make This?
I’d love to hear your feedback! Leave a review and make sure to share your pictures on social media! Don’t forget to follow @thechefsavvy.


Teri
These were so fun to make!! And surprisingly easy! You could actually taste the cheese in these
Caroline
I was excited to try these. I baked them 12 minutes but I didn’t feel they were crunchy enough. I bumped up the temp. To 400 all that did was brown the bottom.
Kelley Simmons
Hi Caroline!
I would just increase the baking time to a couple of minutes and not raise the oven temperature. Also they do crisp up as they cool on the baking sheet too.
Hope this helps. Thanks!
Kelley
Danelle
How do we keep them from rising so much?
Kelley Simmons
Hi!
I poke a whole in each one of them using a wooden chopstick to help them from rising too much in the oven.
Hope this helps!
Kelley