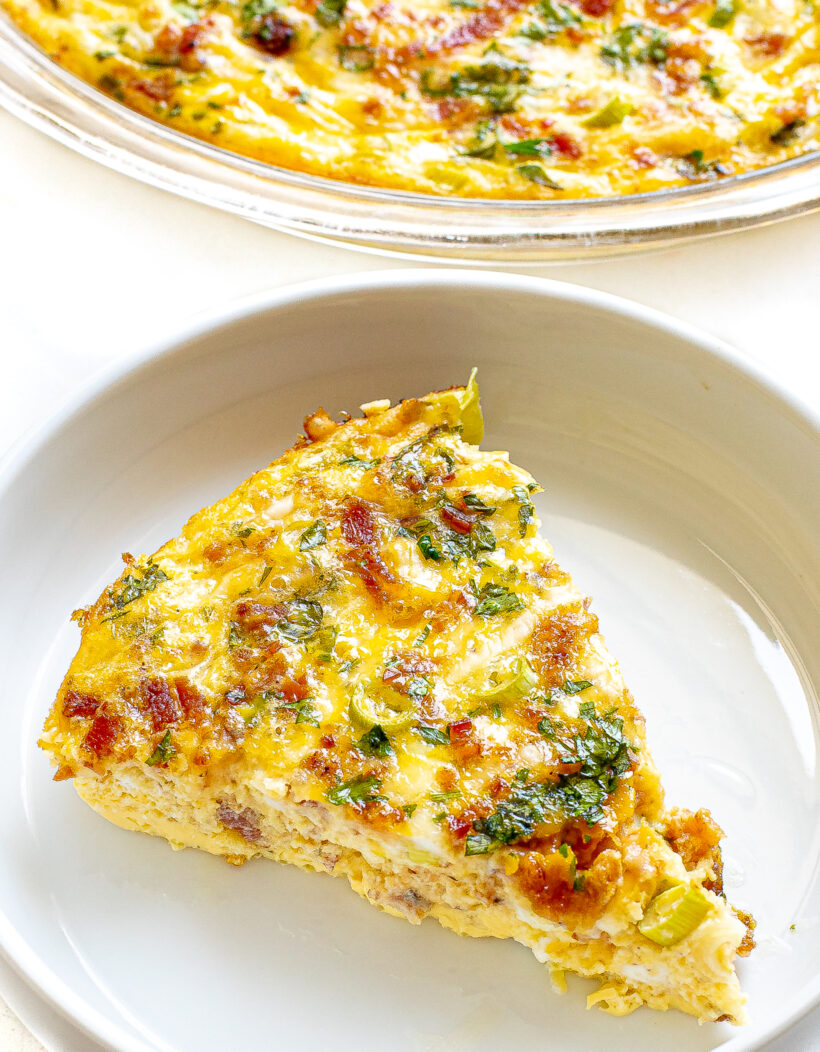
This Cottage Cheese Quiche is the ultimate no-fuss breakfast or brunch recipe! It’s packed with protein from the eggs and cottage cheese, loaded with crispy bacon and melty cheddar, and finished off with green onions and savory seasonings for a flavor-packed dish. With just a few minutes of prep, it’s an easy, satisfying recipe to make any day of the week!

 Kelley’s Tips
Before You Get Started
- Shred your own cheese. Pre-shredded cheese usually has anti-caking agents added to it, which can make it harder to melt. Freshly shredded cheese melts so much better, and it has more flavor too!
- Don’t overbake. The center of the quiche should be just set and only slightly jiggly. Overbaking it can make it rubbery.
- Let the quiche rest before slicing. Giving the quiche 15 minutes to cool makes it easier to slice cleanly and helps the texture firm up.

Ingredients
- Eggs – The base of the quiche! They hold everything together and give it the perfect fluffy texture.
- Cottage cheese – Makes this quiche so creamy! It also adds a lot of protein. It melts right into the eggs, so even cottage cheese haters won’t notice it!
- Bacon – Adds a savory flavor that pairs perfectly with the creamy eggs and cheese.
- Cheddar cheese – Gives the quiche an irresistible gooey, cheesy texture. I highly recommend using extra sharp cheddar cheese for optimal flavor!
- Green onions – Adds a pop of color and a mild onion flavor.
- Garlic powder – Adds a warm, savory depth.
- Onion powder – Adds an extra layer of flavor and enhances the green onion.
How to Make Cottage Cheese Quiche
- Preheat Oven to 350 degrees. Grease a 9 inch pie pan with non stick cooking spray.
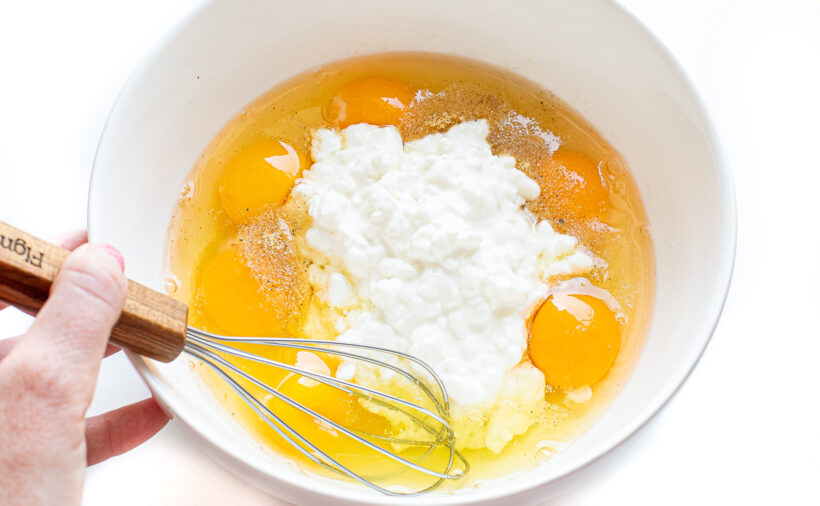
- Combine Quiche Ingredients: In a large bowl combine eggs, cottage cheese, bacon, cheddar cheese, green onions and seasonings.

- Bake the Quiche: Transfer the egg mixture to the greased pie pan and bake for 30-35 minutes. When the quiche starts to look set and get a little golden on top and not too jiggly it is done.
- Cool and Serve: Allow it to cool for 15 minutes before slicing and serving!


Serving Ideas
The quiche is great on its own, but if you’re serving it for things like brunch, baby showers, holidays, etc. it’s fun to pair it with a few other items to round it out!
- Fresh fruit – Serve with my Easy Fruit Salad for a sweet, refreshing side. Fruits like melon, grapes, and pineapple also work great.
- Toast or pastry – Serve it with a slice of warm toast or a Cream Cheese Crescent Danish for a sweet side.
- Green salad – Keep things light and fresh with a simple mixed greens salad tossed in lemon vinaigrette or balsamic dressing. My Berry Spinach Salad would be delicious!
- Roasted potatoes or hash browns – For a heartier meal, add Roasted Sweet Potatoes or hash browns on the side.
- Yogurt parfaits – Layer Greek yogurt with granola and fruit for a boost of extra protein and nutrients.
- Muffins or scones – Round out a brunch menu with something sweet like Berry Yogurt Muffins or Raspberry Scones.

More Egg Recipes to Try
- Tortilla Baked Eggs
- Bacon Egg and Cheese Pastries
- Hashbrown Egg Cups
- Eggs Benedict
- Herb Scrambled Eggs
- Breakfast Burritos
Save this Recipe
Enter your email to get it straight in your inbox! Plus, receive new recipes weekly!

Recipe
Cottage Cheese Quiche
This Cottage Cheese Quiche is the ultimate no-fuss breakfast or brunch recipe! It’s packed with protein from the eggs and cottage cheese, loaded with crispy bacon and melty cheddar, and finished off with green onions and savory seasonings for a flavor-packed dish. With just a few minutes of prep, it’s an easy, satisfying recipe to make any day of the week!
Ingredients
- 6 large eggs
- 1 cup cottage cheese
- 5 slices bacon, cooked and crumbled
- 1 cup cheddar cheese, shredded
- 1/2 cup green onions, sliced
- 1 tsp garlic powder
- 1 tsp onion powder
- 1/4 tsp salt
- 1/4 tsp pepper
Instructions
- Preheat oven to 350 degrees. Grease a 9 inch pie pan with non stick cooking spray. In a large bowl combine eggs, cottage cheese, bacon, cheddar cheese, green onions and seasonings.

- Transfer the egg mixture to the greased pie pan and bake for 30-35 minutes. When the quiche starts to look set and get a little golden on top and not too giggly it is done.

- Allow it to cool for 15 minutes before slicing and serving!

Nutrition Information
Calories: 265kcalCarbohydrates: 4gProtein: 17gFat: 20gSaturated Fat: 8gPolyunsaturated Fat: 2gMonounsaturated Fat: 7gTrans Fat: 0.04gCholesterol: 223mgSodium: 525mgPotassium: 190mgFiber: 0.3gSugar: 1gVitamin A: 598IUVitamin C: 2mgCalcium: 199mgIron: 1mg

Did You Make This?
I’d love to hear your feedback! Leave a review and make sure to share your pictures on social media! Don’t forget to follow @thechefsavvy.


Shaunie Gassner
I’m making this again for an easy meal prepped breakfast for the week!